Add recovery keys with two YubiKeys
Right now, your PDS probably holds the only key that can change your identity. In about ten minutes you can add two YubiKeys that rank above it, so that if your PDS or your account is ever compromised, you can take your identity back.
You’ll need
- An identity already in PLC Keeper. Haven’t added one yet? Start with Add an identity.
- Two YubiKeys with firmware 5.3 or later that connect to your iPhone over NFC or USB-C, or to your iPad over USB-C. Lightning YubiKeys, such as the YubiKey 5Ci, come in a later release. A new YubiKey gets its PIN during setup; one you already use asks for its PIN.
- Your account password, and access to the email address on your account.
Why two?
A recovery key only helps if you still have it. Keep one on your keyring and put the other somewhere safe at home. If you lose one, the other still works.
-
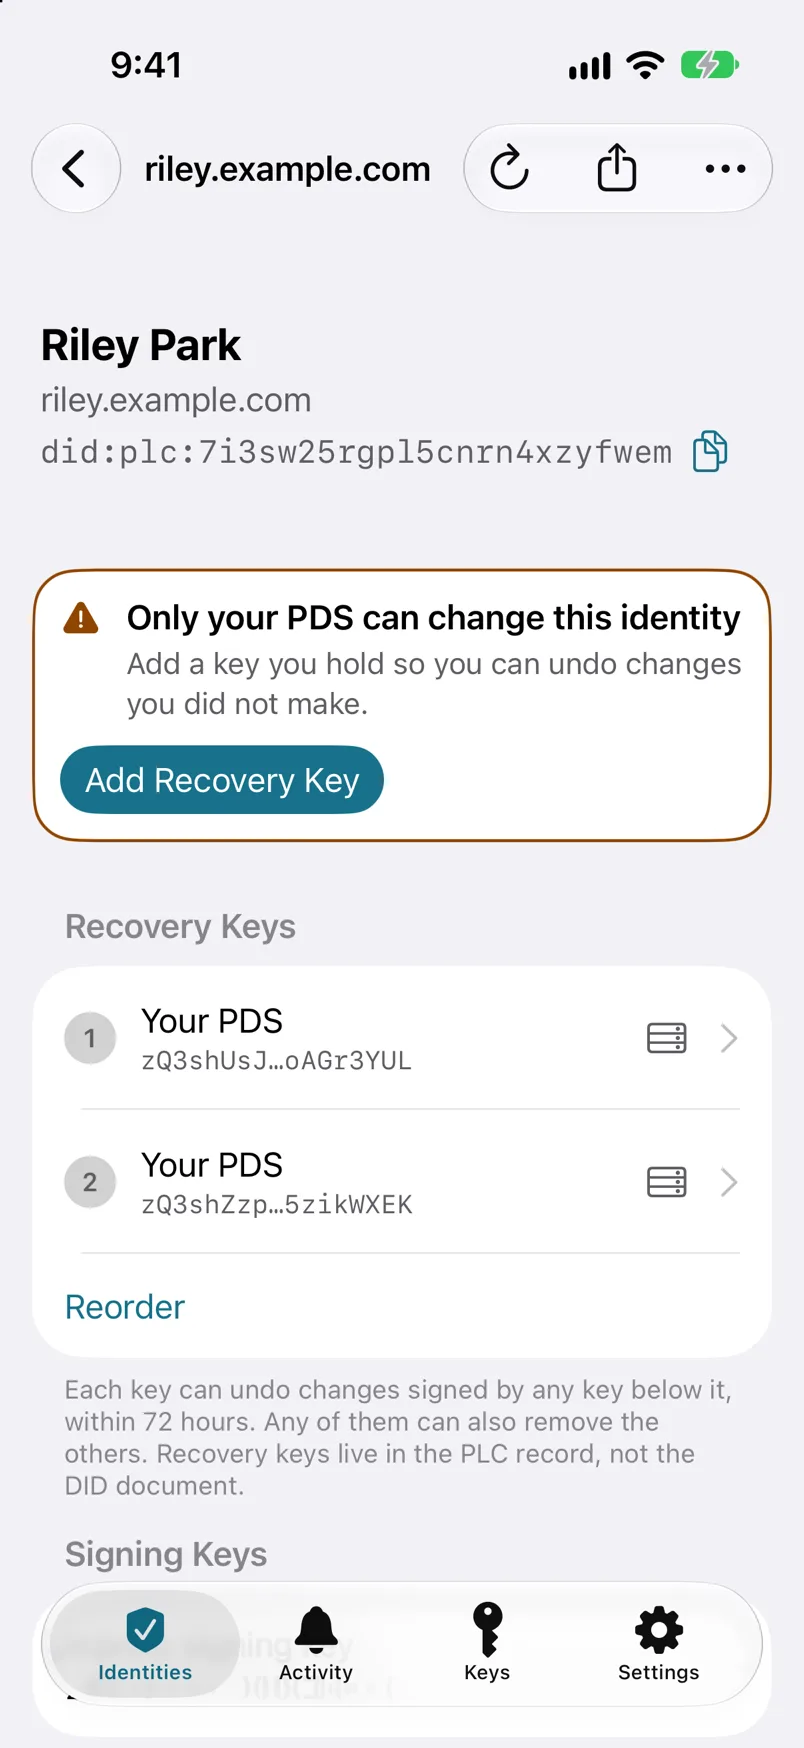
Step 1: Open your identity and tap Add Recovery Key.
You’ll find it on the identity’s screen, in the note that only your PDS can change this identity.
-
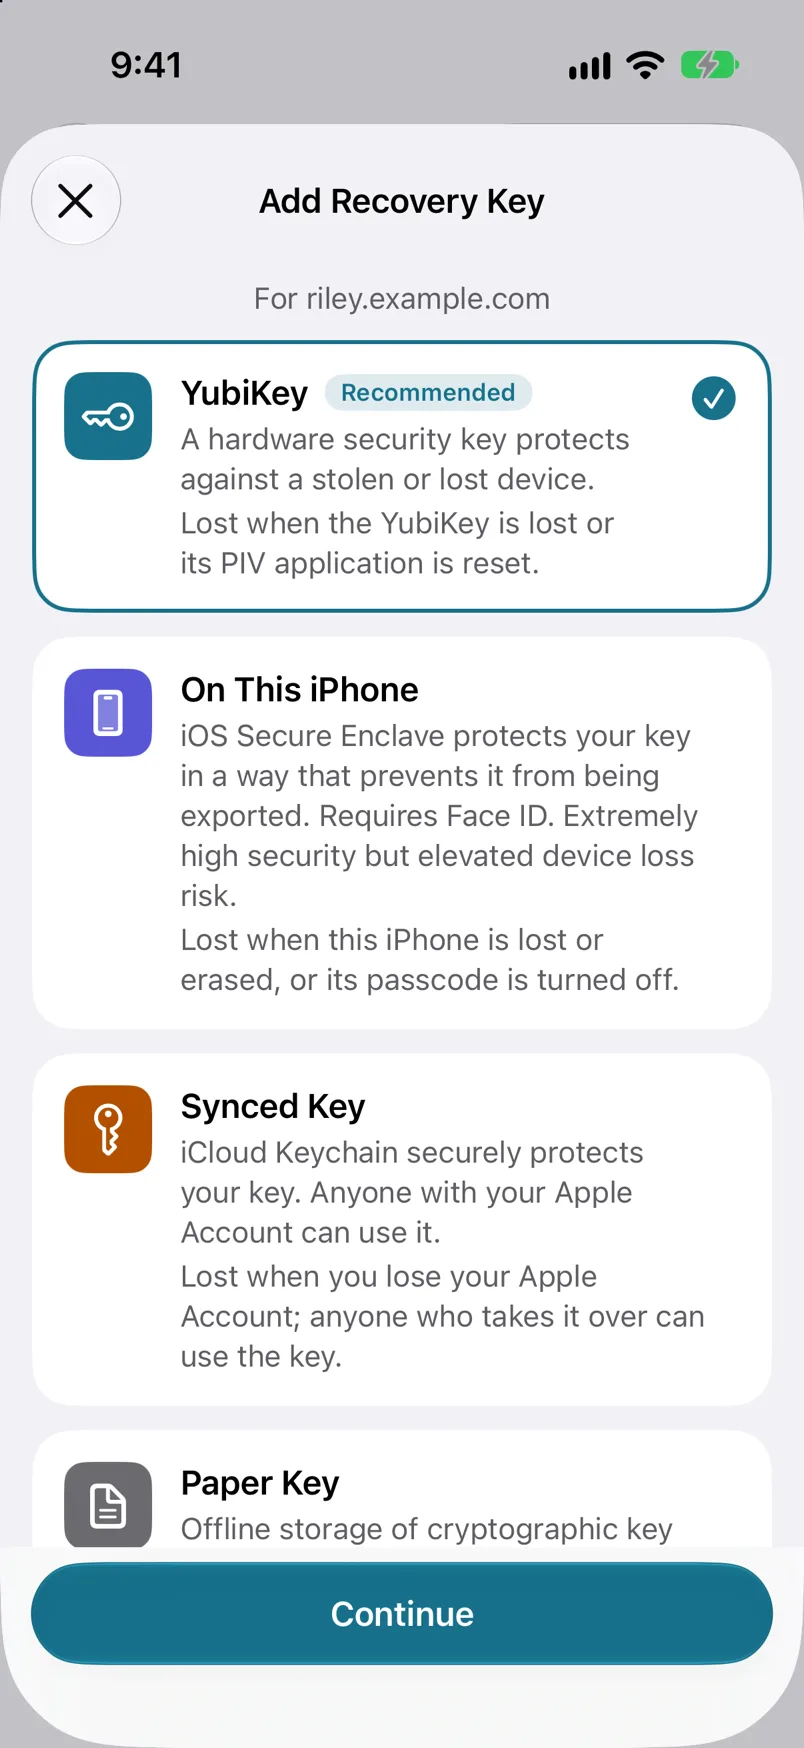
Step 2: Choose YubiKey.
If PLC Keeper asks whether you have a YubiKey, tap Yes, I Have a YubiKey. Otherwise choose YubiKey from the list and tap Continue.
-
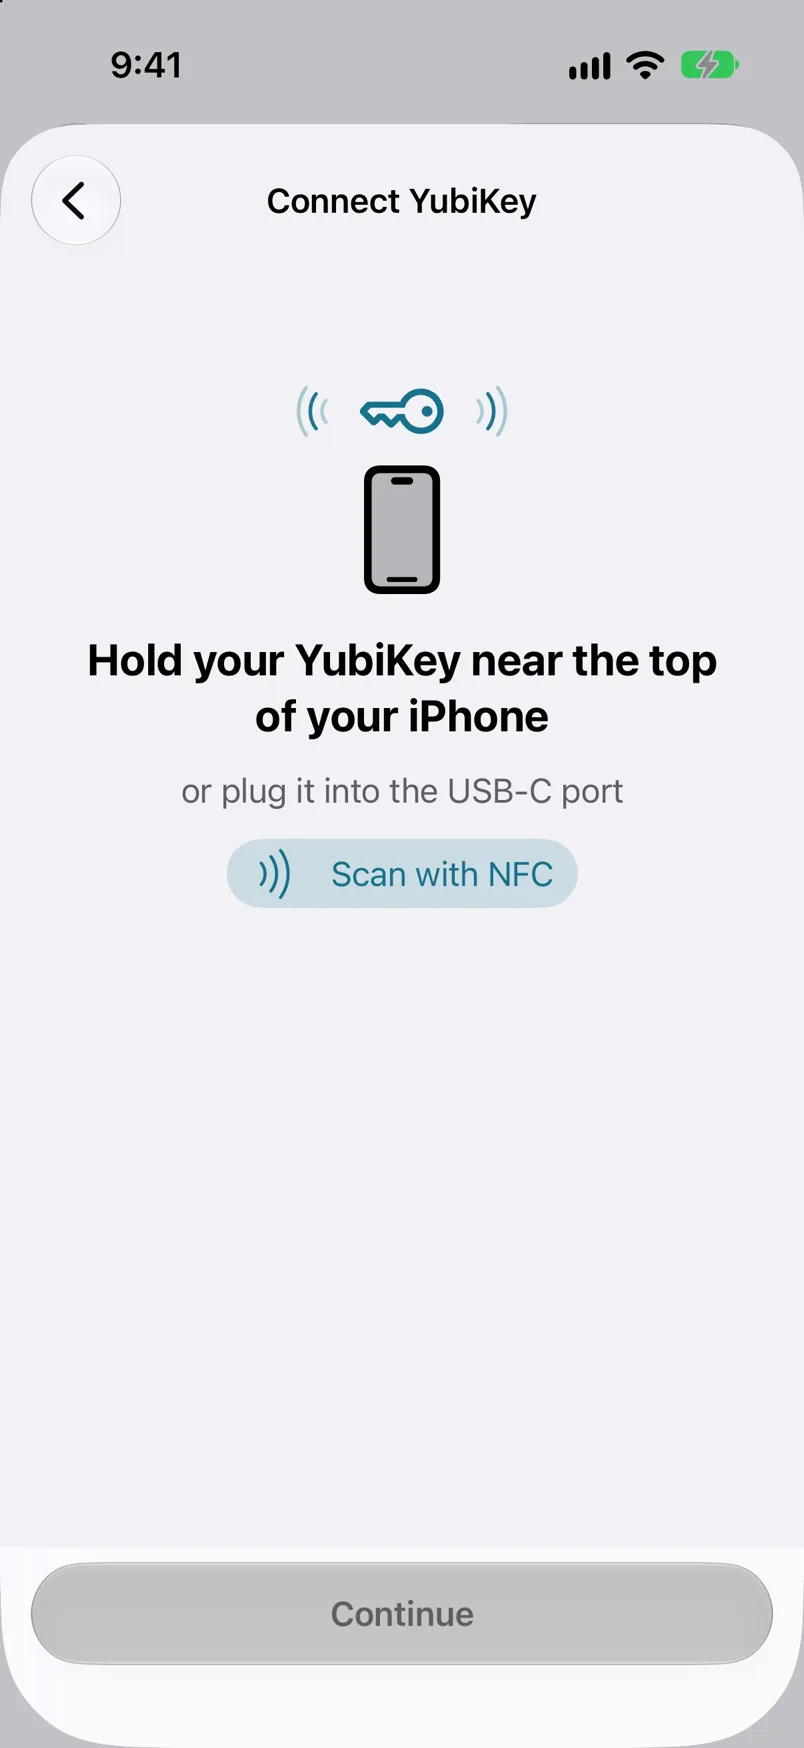
Step 3: Connect your first YubiKey.
Tap Scan with NFC and hold it near the top of your iPhone, or plug it into the USB-C port. PLC Keeper reads the key and shows what it will do; tap Continue. If the YubiKey is new, PLC Keeper has you set its PIN and PUK first; otherwise you enter its PIN. Over NFC you’ll hold the key to your iPhone more than once.
-
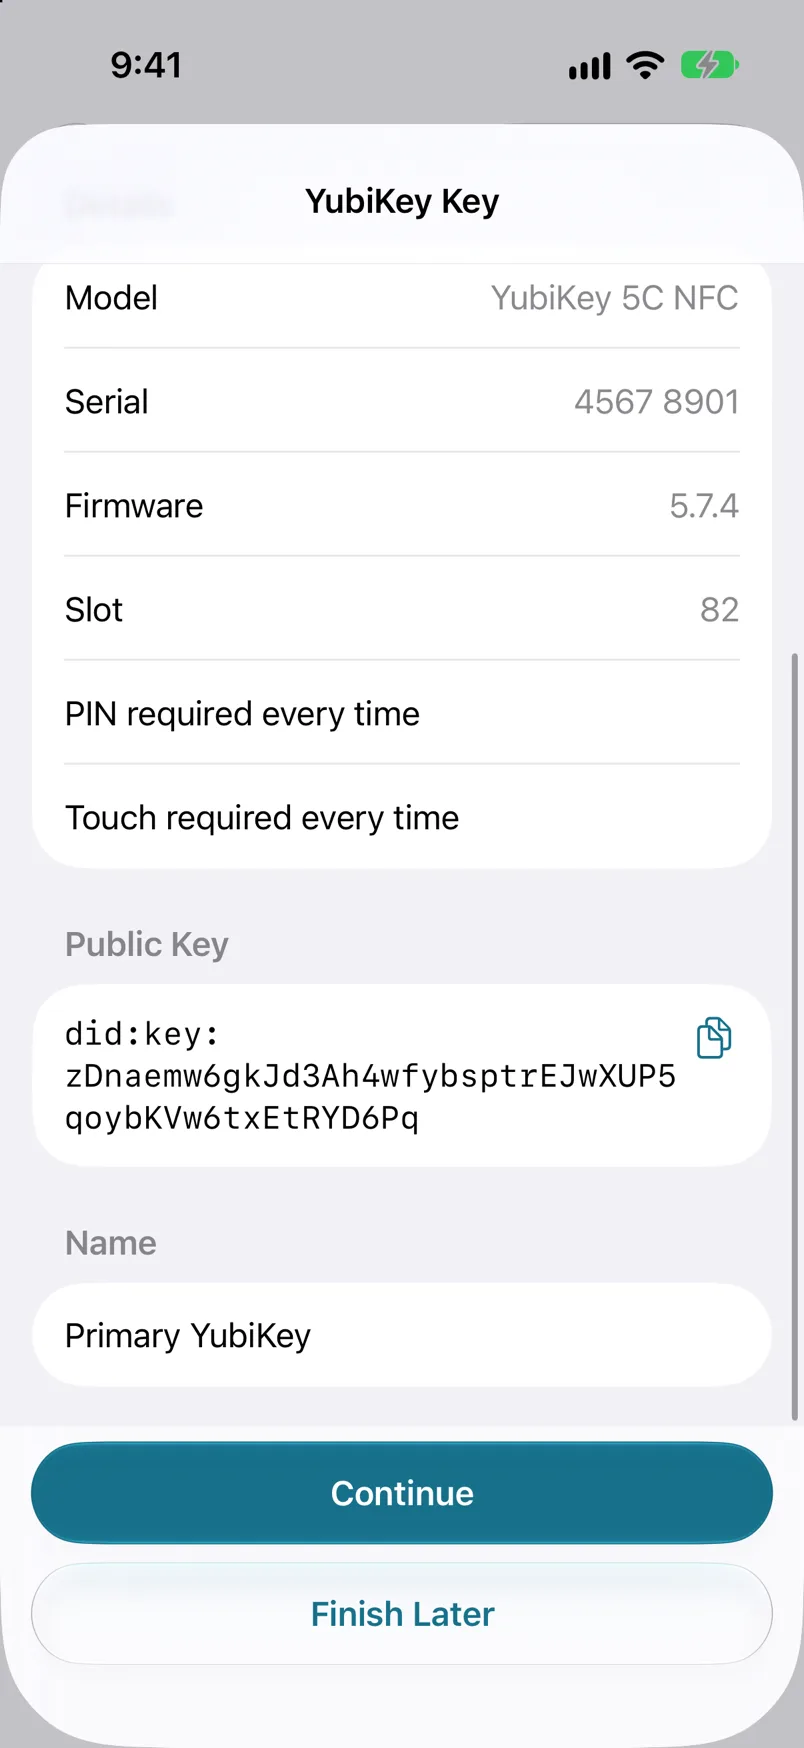
Step 4: Check its name.
PLC Keeper shows the key it created on your YubiKey. The first one is called Primary YubiKey; change the name if you like, then tap Continue. PLC Keeper puts the key at the top of your recovery keys, above your PDS. Tap Review Change.
-
Step 5: Review the change.
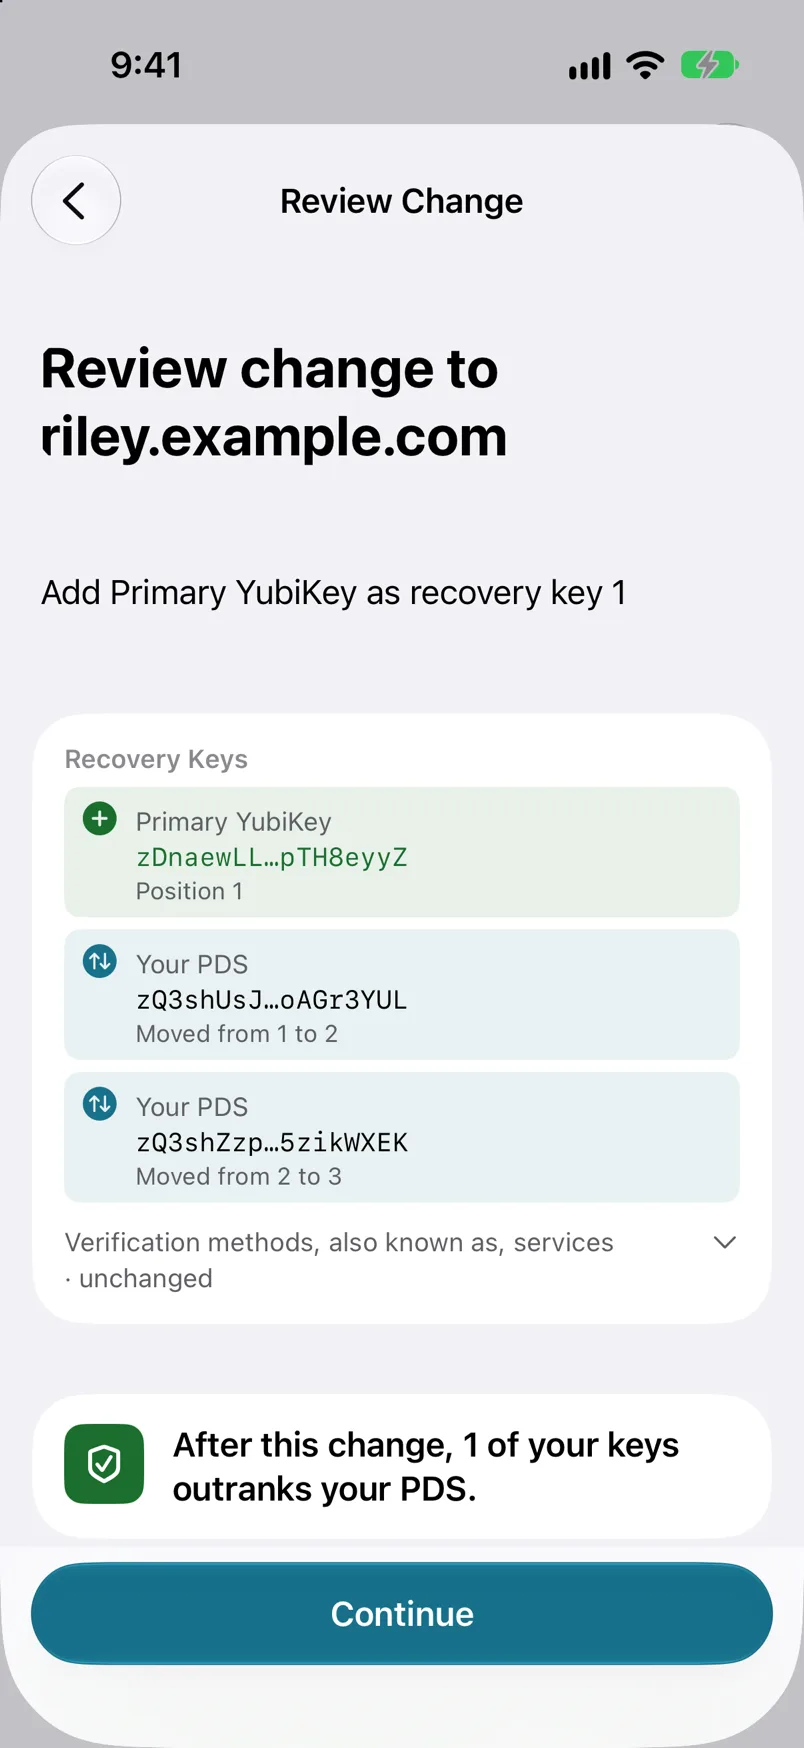
PLC Keeper shows exactly what will change: your YubiKey goes to the top of the list, and your PDS keys each move down one place. Nothing else changes. Tap Continue.
-
Step 6: Sign in to your PDS.
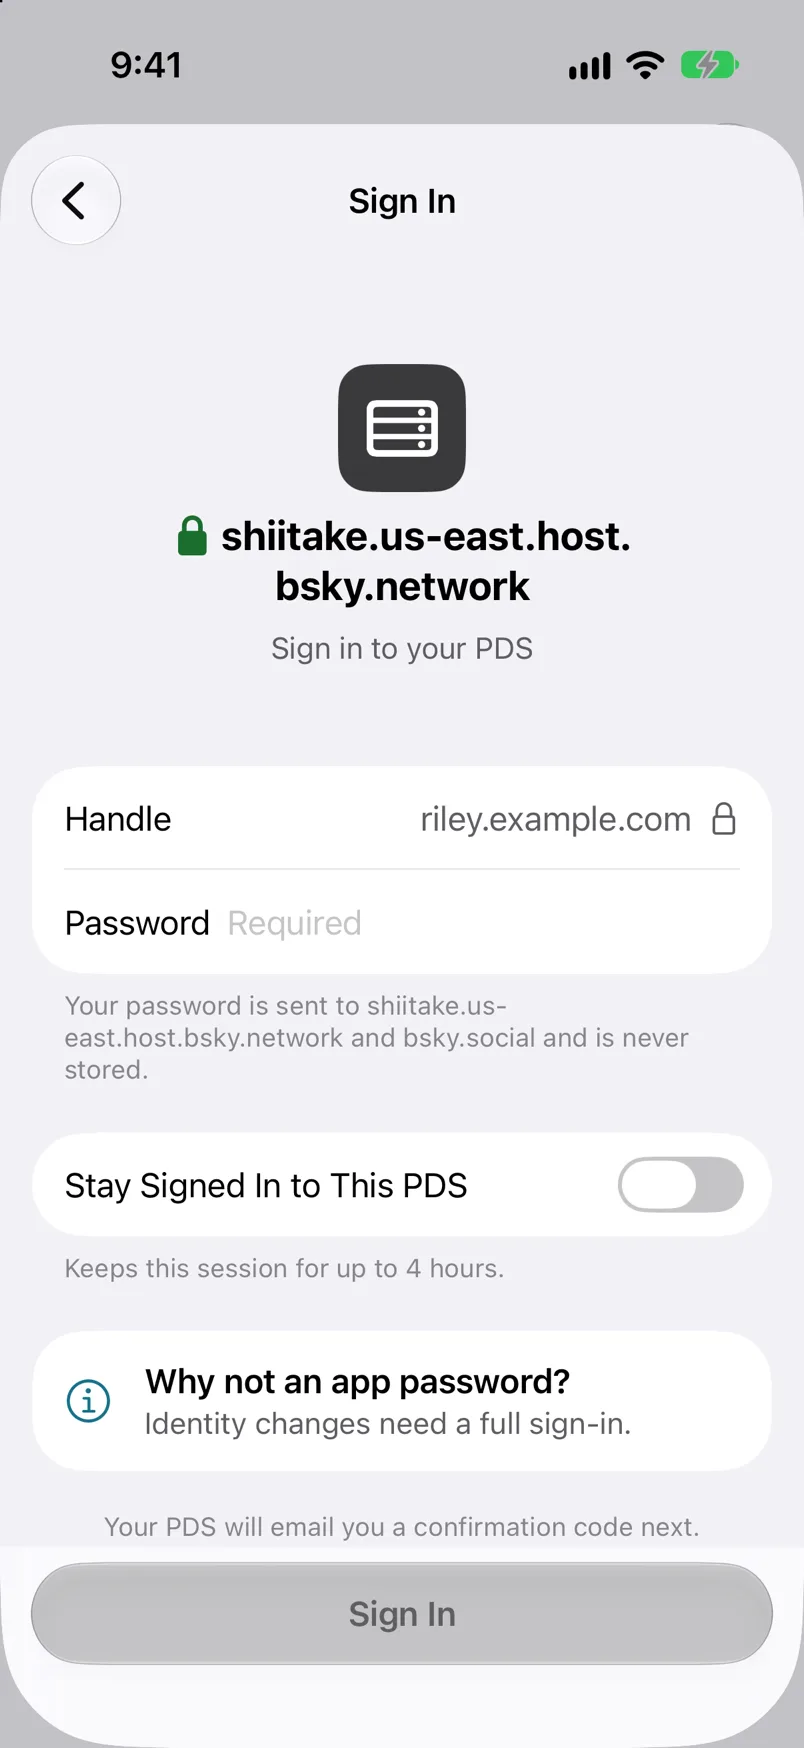
Your PDS holds the current keys, so it has to approve this change. On Choose a Signing Key, leave Your PDS selected and tap Sign, then sign in with your account password. An app password won’t work here.
-
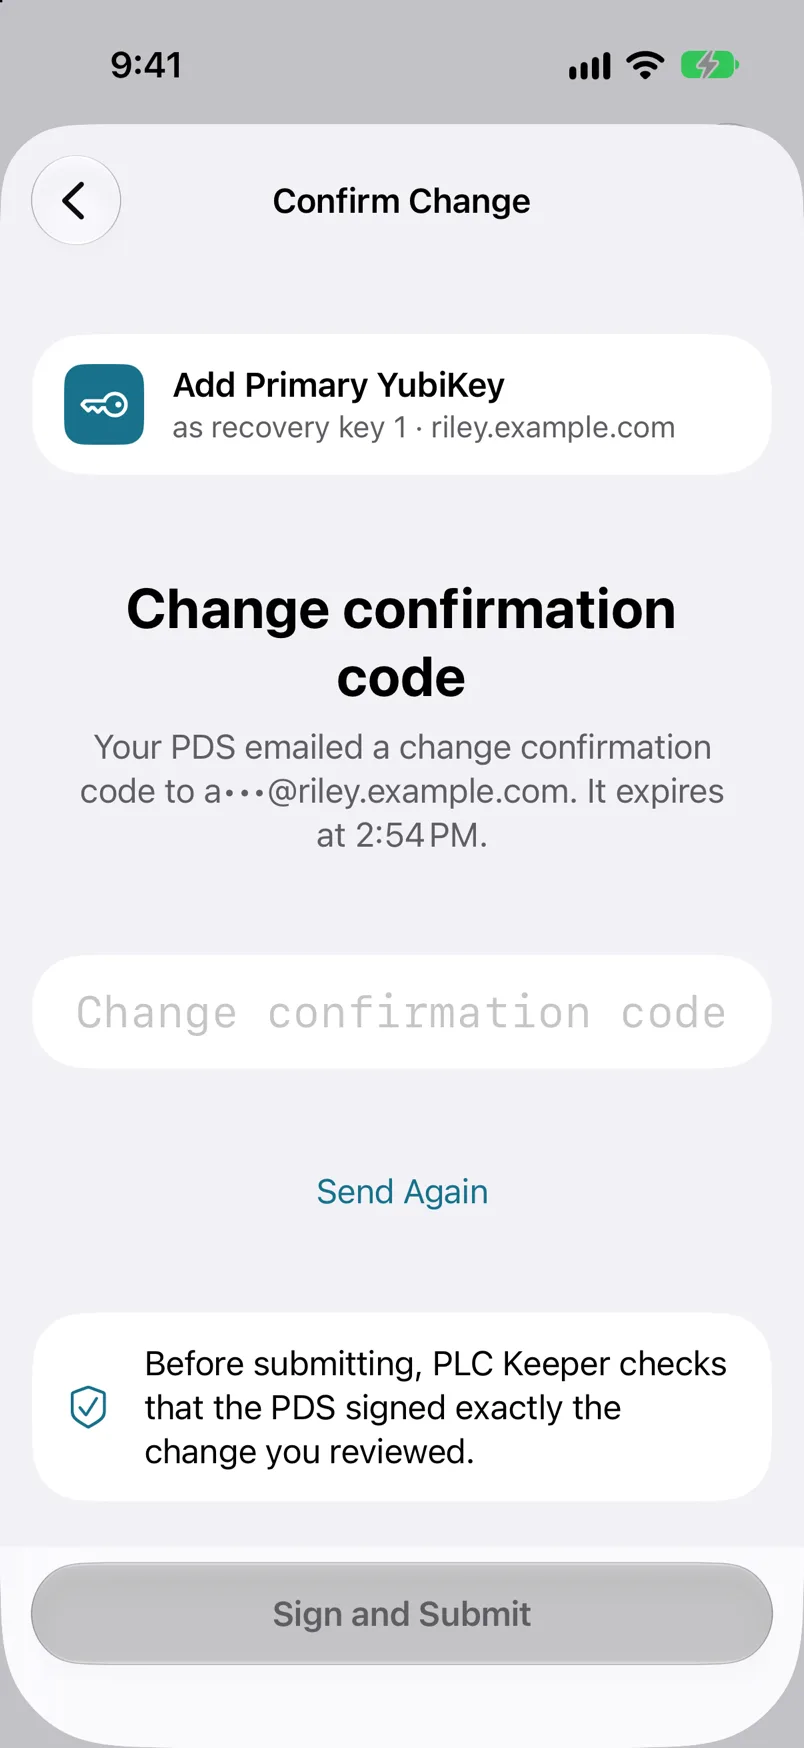
Step 7: Enter the code from your email, then tap Sign and Submit.
Your PDS emails a confirmation code to the address on your account. Before submitting, PLC Keeper checks that the PDS signed exactly the change you reviewed.
-
Step 8: Add your second YubiKey.
Repeat the steps with your second key, and name it something like Backup YubiKey. This time your Primary YubiKey can sign the change instead of your PDS.
It worked if
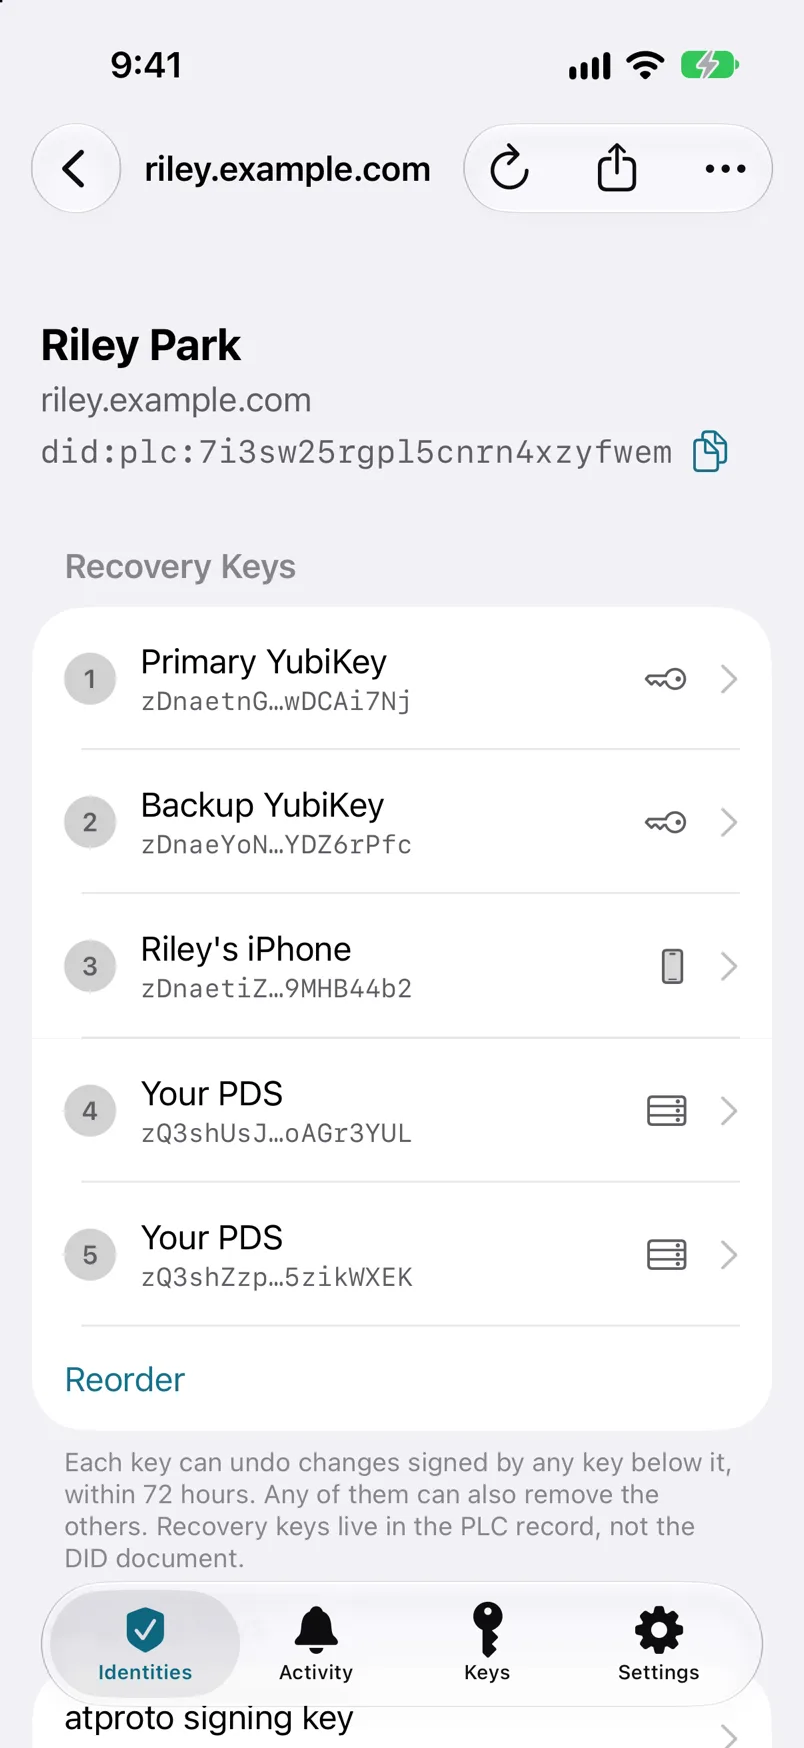
Your identity shows both YubiKeys above your PDS, and the note that only your PDS can change this identity is gone.